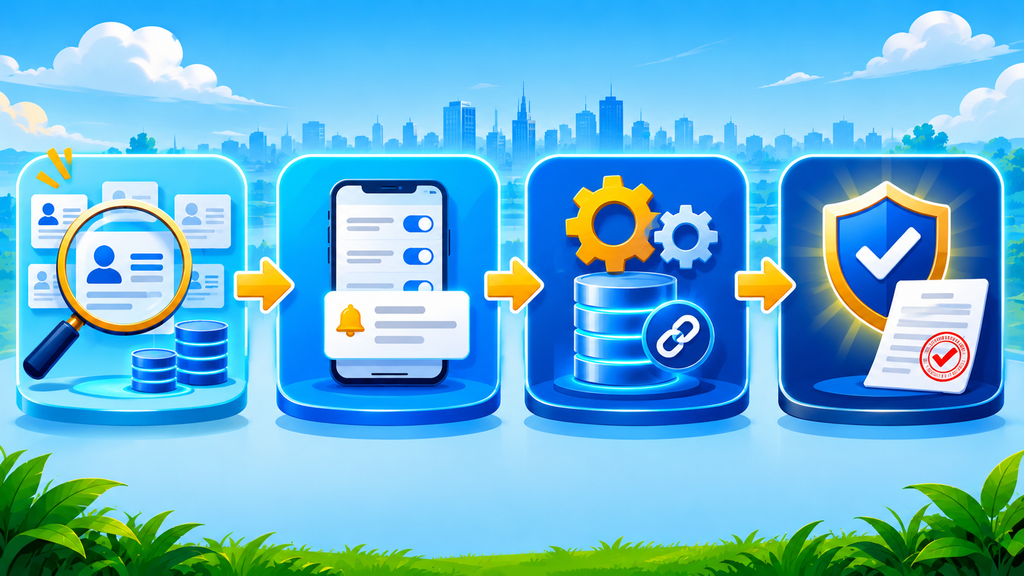
To be ready for 13 May 2027, a business needs to complete 15 consent tasks across four phases: discover what data it holds, design compliant notices and capture screens, build the systems that store and enforce consent, and prove that everything works. From today, roughly 28 weeks remain. This checklist gives each task an owner and a target date.
If you are searching for a practical way to organise your DPDP consent management work, you are in the right place. Rather than repeat the legal theory, this article focuses on action. Nevertheless, a short refresher helps: the Digital Personal Data Protection Act, 2023 makes consent the principal legal basis for handling personal data, and the DPDP Rules, 2025 bring the detailed notice, consent and security duties into force on 13 May 2027. For the full legal background, please read our DPDP consent management guide.
How much time is left?
As of 27 October 2026, there are about 198 days, or roughly 28 weeks, until 13 May 2027. At first glance, that sounds comfortable. However, experience with similar regulations suggests that the calendar shrinks faster than expected. Budget approvals take weeks, vendor selection takes more, and integrations with older systems take longest of all.

Meanwhile, some parts of the framework are already in motion. The Data Protection Board provisions took effect on 13 November 2025, and Consent Manager registration begins on 13 November 2026. Therefore, the ecosystem around you is already forming, even though your own consent duties start later.
A sensible rule of thumb is to treat March 2027 as your real deadline. That choice leaves roughly six weeks for testing, fixing and rehearsing. In addition, it protects you against the unavoidable surprises that appear in any large change programme.
How to use this checklist
Before diving in, here are three tips for getting the most from it.
- Assign one owner per step. Shared ownership often becomes no ownership.
- Work in phases. Each phase builds on the one before; skipping ahead usually causes rework.
- Record evidence as you go. For every step, save a screenshot, document or log. Later, this becomes part of your proof pack.
With that in mind, let us begin.
Phase 1: Discover (steps 1–4)
The first phase answers a simple but often uncomfortable question: what personal data do we really hold, and why? Most organisations discover more data, in more places, than they expected.
Step 1: Build a data inventory
List every system, form, app, spreadsheet and third-party tool that collects or stores personal data about people in India. For each, note the fields collected, the source, the storage location and the retention period. Include offline sources such as branch forms and call-centre scripts, because the Act does not distinguish between digital and paper journeys once data is digitised.
Step 2: Create a purpose register
Next, write down every purpose for which you use that data. Be specific: “to deliver your order” is a purpose, whereas “business improvement” is far too vague. Each purpose should connect to the fields it truly needs. This connection supports the “specific” and “limited to necessary data” tests in Section 6(1).
Step 3: Map each purpose to a lawful basis
Then decide whether each purpose rests on consent or on a Section 7 legitimate use, such as compliance with a legal obligation or an employment purpose. Be strict here. Marketing, profiling and cross-selling rarely qualify as legitimate uses. As a result, they will land in the consent column, and your consent screens must reflect that.
Step 4: List every Data Processor
Finally, identify every vendor that handles personal data for you: cloud hosts, CRMs, payment gateways, SMS and email providers, analytics tools and outsourced call centres. For each, record what data it receives, where it is stored and which contract governs it. Since a withdrawal must reach processors too, this list becomes the backbone of your enforcement design later.
Phase 1 output: a data inventory, a purpose register, a lawful-basis map and a processor list.

Phase 2: Design (steps 5–8)
With the facts in hand, the second phase turns to what customers actually see and experience.
Step 5: Draft Rule 3 notices
Create a notice for each purpose or group of closely related purposes. Under Rule 3, every notice must stand on its own and contain an itemised list of the data, the specific purpose, a way to withdraw consent, and details on exercising rights and complaining to the Data Protection Board. Keep the language short and plain. Long legal paragraphs defeat the point of an “informed” consent.
Step 6: Plan languages and versions
Section 6(3) lets a person ask for the request in English or any of the 22 languages in the Eighth Schedule. Decide which languages your customer base needs first, and arrange reliable translations. In addition, set up a version system so that every notice change gets a new number and a date. Later, this lets you prove which text a customer saw.
Step 7: Redesign the capture experience
Now turn to the user interface. Remove pre-ticked boxes, remove bundled consent, and show purposes separately so a person can say yes to one and no to another. Moreover, ensure that declining an optional purpose does not block a service that does not need it. Apply the same rules to apps, websites, branch forms, agent-assisted onboarding and IVR scripts.
Step 8: Design the children’s flow
If you might process data of anyone under 18, plan a verifiable parental consent flow under Section 9 and Rule 10. This includes the method of checking that the consenting person is an adult parent or guardian, and the controls that stop tracking and targeted advertising aimed at children. Sectors such as edtech, gaming and healthcare should treat this step as urgent. See our pages for edtech and schools for sector-specific notes.
Phase 2 output: approved notices, a language plan, redesigned capture screens and a children’s consent flow.
Phase 3: Build (steps 9–12)
Design on paper is only the beginning. The third phase turns it into working systems.

Step 9: Set up a consent store
Choose or build a central repository where each consent is saved as its own record. Every record should hold the customer ID, channel, purposes accepted and declined, notice version, language, timestamp and method. Crucially, the store must keep history rather than overwrite values, because Section 6(10) places the burden of proof on you. A tamper-evident design is far safer than an editable table.
Step 10: Connect downstream systems
Next, make your CRM, marketing automation, analytics, data warehouse and partner systems check consent before they use data. Ideally, they should call an API or read a synchronised flag. Old CSV exports are dangerous, since they quickly drift out of date.
Step 11: Build the withdrawal path
Section 6(4) requires withdrawal to be as easy as giving consent. Therefore, create a withdrawal route in every channel where consent can be given. When someone withdraws, the system must stop the relevant processing and notify your processors. At the same time, it must distinguish stopping use from deleting data, because laws such as RBI, SEBI and PMLA rules may require retention. Our pages for banks and stock brokers explain this in more detail.
Step 12: Launch a rights and grievance portal
Finally, give people a clear way to ask for access, correction, erasure and grievance redressal, and to name a nominee where relevant. Define response timelines, escalation paths and a named contact, such as your Data Protection Officer where applicable. Track every request from receipt to closure.
Phase 3 output: a working consent store, synchronised systems, a tested withdrawal path and a live rights portal.
Phase 4: Prove (steps 13–15)
Finally, the last phase checks that everything works under pressure. After all, a regulator or a disputing customer will test your system, not your intentions.

Step 13: Run an audit-trail test
Pick ten customers at random and try to produce, within five minutes each, their full consent history: what they agreed to, which notice they saw, when, through which channel, and any later changes. If the test fails, find out why and fix the gap. Repeat the exercise monthly until it passes consistently.
Step 14: Hold a breach drill
The Rules also require timely breach reporting, and consent records are part of the personal data at stake. Therefore, rehearse a realistic incident. Practise who decides, who informs the Board and affected people, and how quickly. Afterwards, update the playbook with what you learned.
Step 15: Obtain DPO and grievance sign-off
To close the programme, have your DPO, legal head and business owners review the evidence pack and sign off. Confirm that contact details appear in your notices, that grievance handling works end to end, and that periodic reviews are scheduled. Importantly, compliance does not end here. Treat sign-off as the start of ongoing monitoring.
Phase 4 output: a passed audit-trail test, a completed breach drill and a signed readiness report.
Owner and timeline table
The table below suggests who should lead each step and when to finish it. Of course, adjust the dates to your own size and complexity.
| Step | Task | Suggested owner | Effort | Target date |
|---|---|---|---|---|
| 1 | Data inventory | IT / Data lead | High | Nov 2026 |
| 2 | Purpose register | Product + Legal | Medium | Nov 2026 |
| 3 | Lawful-basis mapping | Legal / DPO | Medium | Dec 2026 |
| 4 | Processor list | Procurement + IT | Medium | Dec 2026 |
| 5 | Rule 3 notices | Legal + Content | Medium | Dec 2026 |
| 6 | Languages and versioning | Content + Product | Medium | Jan 2027 |
| 7 | Capture redesign | Product + Design | High | Jan 2027 |
| 8 | Children’s flow | Product + Legal | Medium | Jan 2027 |
| 9 | Consent store | Engineering | High | Feb 2027 |
| 10 | Downstream sync | Engineering | High | Feb 2027 |
| 11 | Withdrawal path | Engineering + Support | Medium | Feb 2027 |
| 12 | Rights and grievance portal | Support + DPO | Medium | Mar 2027 |
| 13 | Audit-trail test | Compliance + IT | Low | Mar 2027 |
| 14 | Breach drill | Security + Legal | Low | Apr 2027 |
| 15 | DPO sign-off | DPO / Leadership | Low | Apr 2027 |
Common reasons checklists fail
Even with a clear plan, teams run into predictable trouble. Watch out for these four.
- Starting with the tool. Buying software before mapping data usually leads to a poor fit.
- Ignoring offline channels. Paper forms and phone scripts are easy to forget but legally equal.
- Treating legal as the only owner. Consent touches product, engineering, marketing and support, so a cross-functional team is essential.
- Skipping the test. A system that has never been challenged tends to fail the first time someone does challenge it.
Do I need all 15 steps?
The answer depends on your size and data footprint. A small business with one website and one email tool can complete the steps quickly, often in a few weeks, using lightweight methods. By contrast, a bank with dozens of systems may need most of the programme period. Nevertheless, the logic stays identical: know your data, write clear notices, build reliable capture and withdrawal, and keep proof.
Download the checklist
Would you like a printable version with owner columns and progress boxes? Download the free 15-step DPDP consent checklist as a PDF and share it with your team. To see how a platform can automate several of these steps, book a SecureCMS demo. SecureCMS offers consent collection with OTP on email, SMS and WhatsApp, purpose management with a data catalogue, withdrawal handling, instant revocation enforcement, rights-request automation and blockchain-backed audit logs.
Frequently asked questions
How long does DPDP readiness take?
For a small business, a few weeks may be enough. And for a mid-sized company, three to six months is realistic. For a large regulated enterprise with many legacy systems, plan to use most of the time before 13 May 2027.
Who owns DPDP compliance internally?
Legal or the Data Protection Officer usually leads, but delivery depends on product, engineering, marketing, security and customer support. Name one accountable executive and a working group so decisions move quickly.
Do small businesses need all 15 steps?
The obligations apply to organisations of every size, although the effort will be smaller. Use the checklist as a guide, and scale each step to your reality. If you collect personal data from people in India, none of the underlying duties disappear.
Final thoughts
In conclusion, a DPDP consent programme succeeds when it is broken into small, owned and dated tasks. Start with discovery, move through design and build, and finish with proof. Furthermore, keep evidence at every stage, because the ability to demonstrate compliance matters as much as compliance itself. With roughly 28 weeks left, the time to begin is now.
This article summarises the law for general information and is not legal advice. Please consult a qualified legal professional for your specific situation.